Easy Java desktop UI with JavaFX and gluon scene builder
If you need some GUI for your desktop Java application you can use the scene builder from Gluon to drag and drop controls and you can then export them into a .fxml file that you can load using JavaFX. In this example we are using Java 11 and maven.
You can find the code for this example here: JavaFX example.
You just need these dependencies in your project pom:
  <dependency>
    <groupId>org.openjfx</groupId>
    <artifactId>javafx-controls</artifactId>
    <version>15.0.1</version>
  </dependency>
  <dependency>
    <groupId>org.openjfx</groupId>
    <artifactId>javafx-fxml</artifactId>
    <version>11.0.1</version>
  </dependency>
You will also need to add this plugin:
<plugin>
  <groupId>org.openjfx</groupId>
  <artifactId>javafx-maven-plugin</artifactId>
  <version>0.0.5</version>
  <configuration>
    <mainClass>dev.jsedano.example.App</mainClass>
  </configuration>
</plugin>
Where dev.jsedano.example.App is where you have your main class. Then you can load the scene like this:
package dev.jsedano.example;

import javafx.application.Application;
import javafx.fxml.FXMLLoader;
import javafx.scene.Parent;
import javafx.scene.Scene;
import javafx.stage.Stage;

import java.io.File;

public class App extends Application {

    public static void main( String[] args ){
        launch();
    }

    @Override
    public void start(Stage stage) throws Exception {
        File f = new File("src/main/resources/exampleui.fxml");
        Parent root  = FXMLLoader.load(f.toURI().toURL());

        stage.setScene(new Scene(root));
        stage.show();
    }
}
In this example our fxml file is called exampleui.fxml
That’s pretty much it.
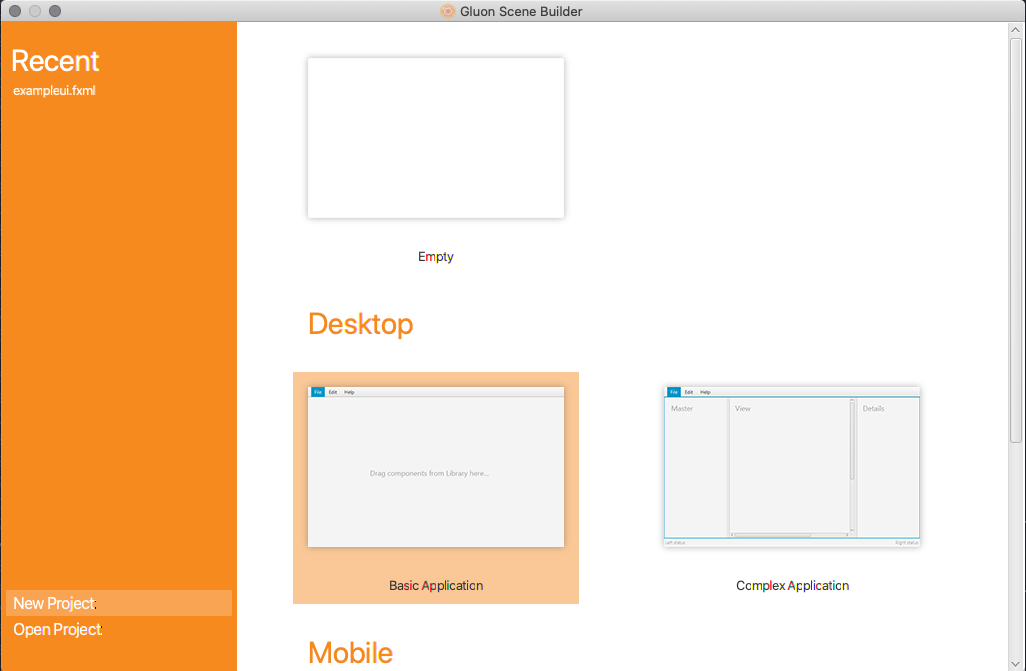
But how about actually creating the fxml file, download and install Gluon scene builder. In this example we will start with a Basic Application:
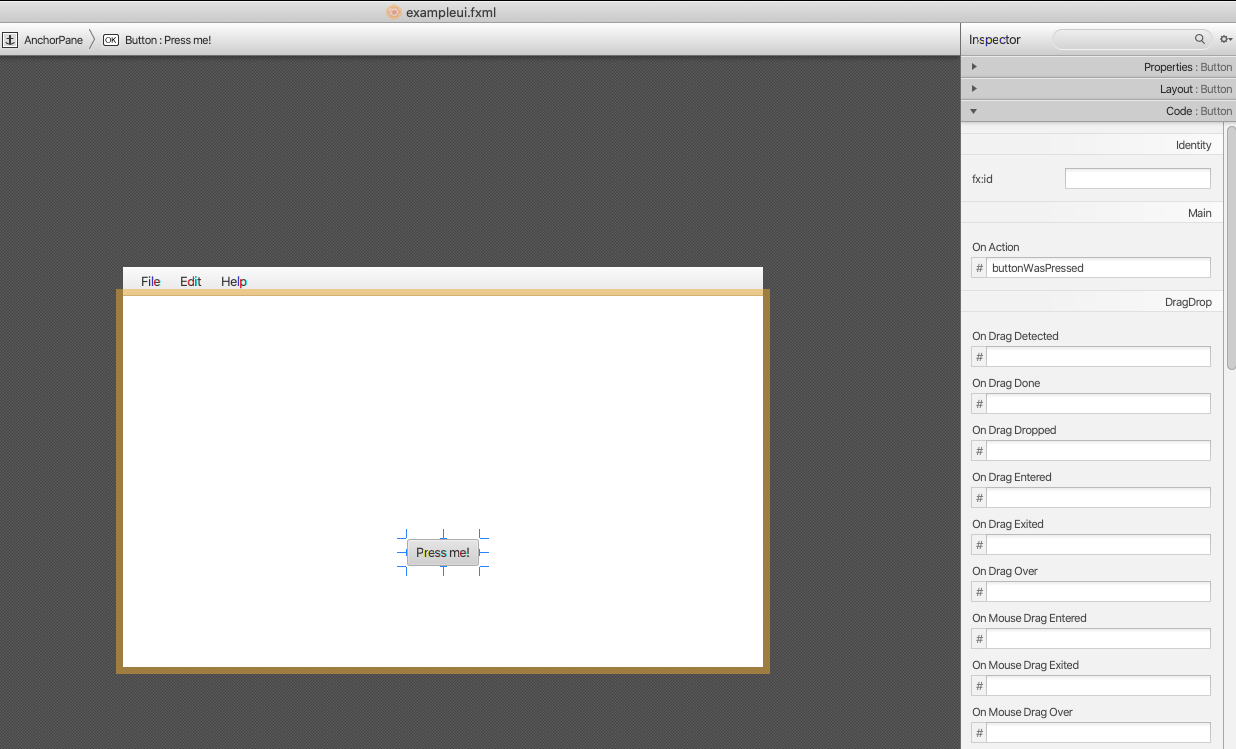
We will drag a button and a label. Select the button and we will change the text to Press me! on the Properties tab and in the Code tab we will set On Action to buttonWasPressed:
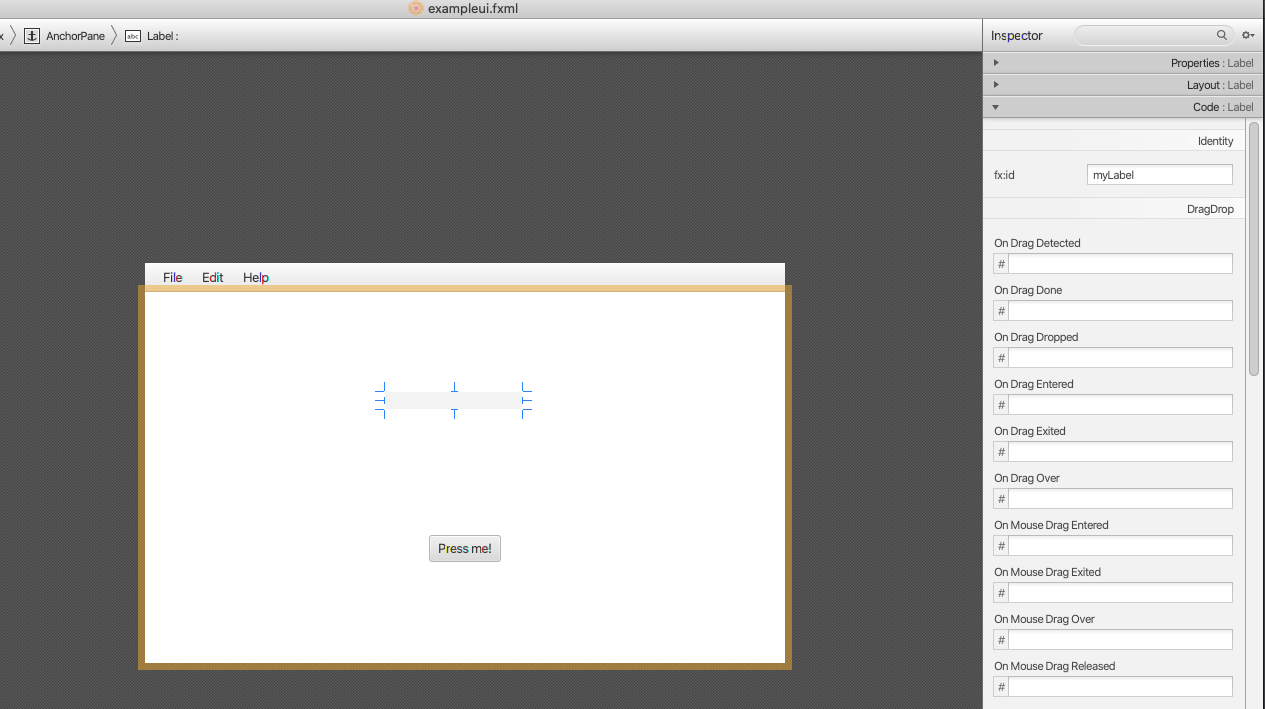
For the label we will delete the text and set the fx:id to myLabel.
Now we need to define the controller. On the left panel look for Document and then Controller and set the Controller class to what your controller will be named, on this example we will use dev.jsedano.example.UIController (this is the fully qualified class name).
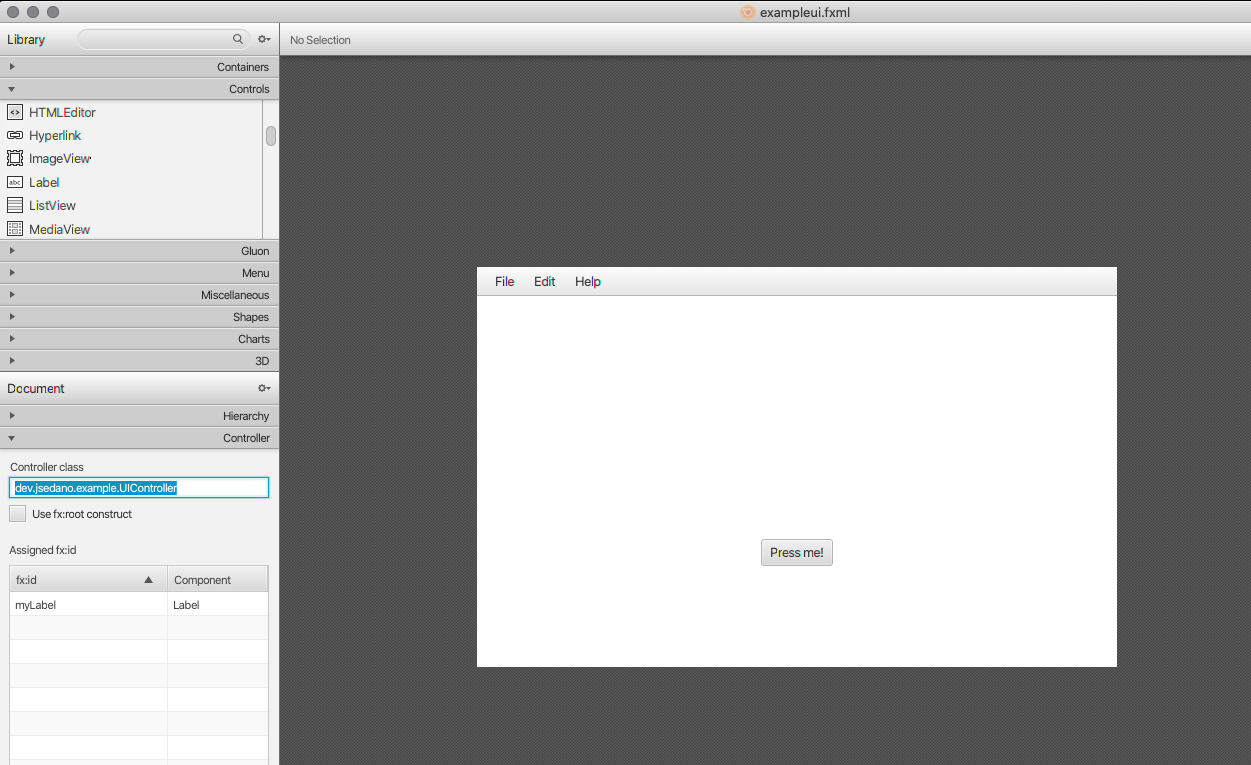
And then we can save the generated fxml directly into our project resources folder, in this example we save to src/main/resources/exampleui.fxml
Now create the controller on the project
package dev.jsedano.example;

import javafx.fxml.FXML;
import javafx.scene.control.Label;

public class UIController {

    @FXML
    private Label myLabel;

    @FXML
    private void buttonWasPressed(){
        myLabel.setText("button was pressed");
    }
}
We run the project using mvn clean javafx:run
And if everything was correct we should be seeing this when we press the button:

From then on you can create anything you need, for documentation on JavaFX visit https://openjfx.io. Download the complete code from this example here JavaFX example.